Look At Workflow
Workflow for Look At setup in Houdini
Interactive Node Diagram
LOOK_ATOBJ
LOOK_ATDive
GLTF Preview
Preview the 3D model associated with the Look At workflow. Interact with the model to see the effects of the Look At setup in real-time.
Preview layout:
In this preview, point_2 is set to look at point_1. You can also switch the setup so that point_2 looks at point_3 instead.
Preview layout:
- point_1 is the lowest point.
- point_2 is the middle left.
- point_3 is the top right.
In this preview, point_2 is set to look at point_1. You can also switch the setup so that point_2 looks at point_3 instead.
Variations
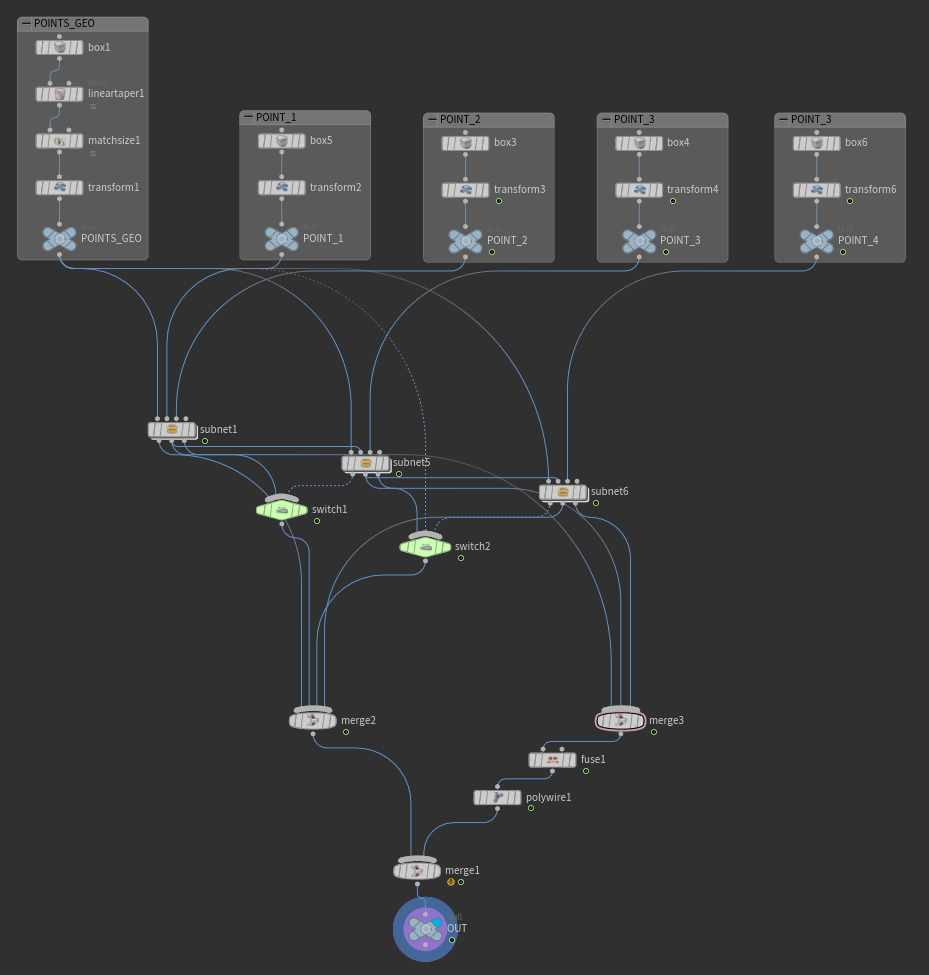
Another point added on here to create total of 4 points. Point 3 (similar to 2) can be configured to look at point 2 or 4 via switch node.
Subnets output two-point lines, which are fused together to form one line, and polywire node to give geometry to the line.
Additional point added and line from each two-point pairs, fused together to form one.
Subnets output two-point lines, which are fused together to form one line, and polywire node to give geometry to the line.
Additional point added and line from each two-point pairs, fused together to form one.
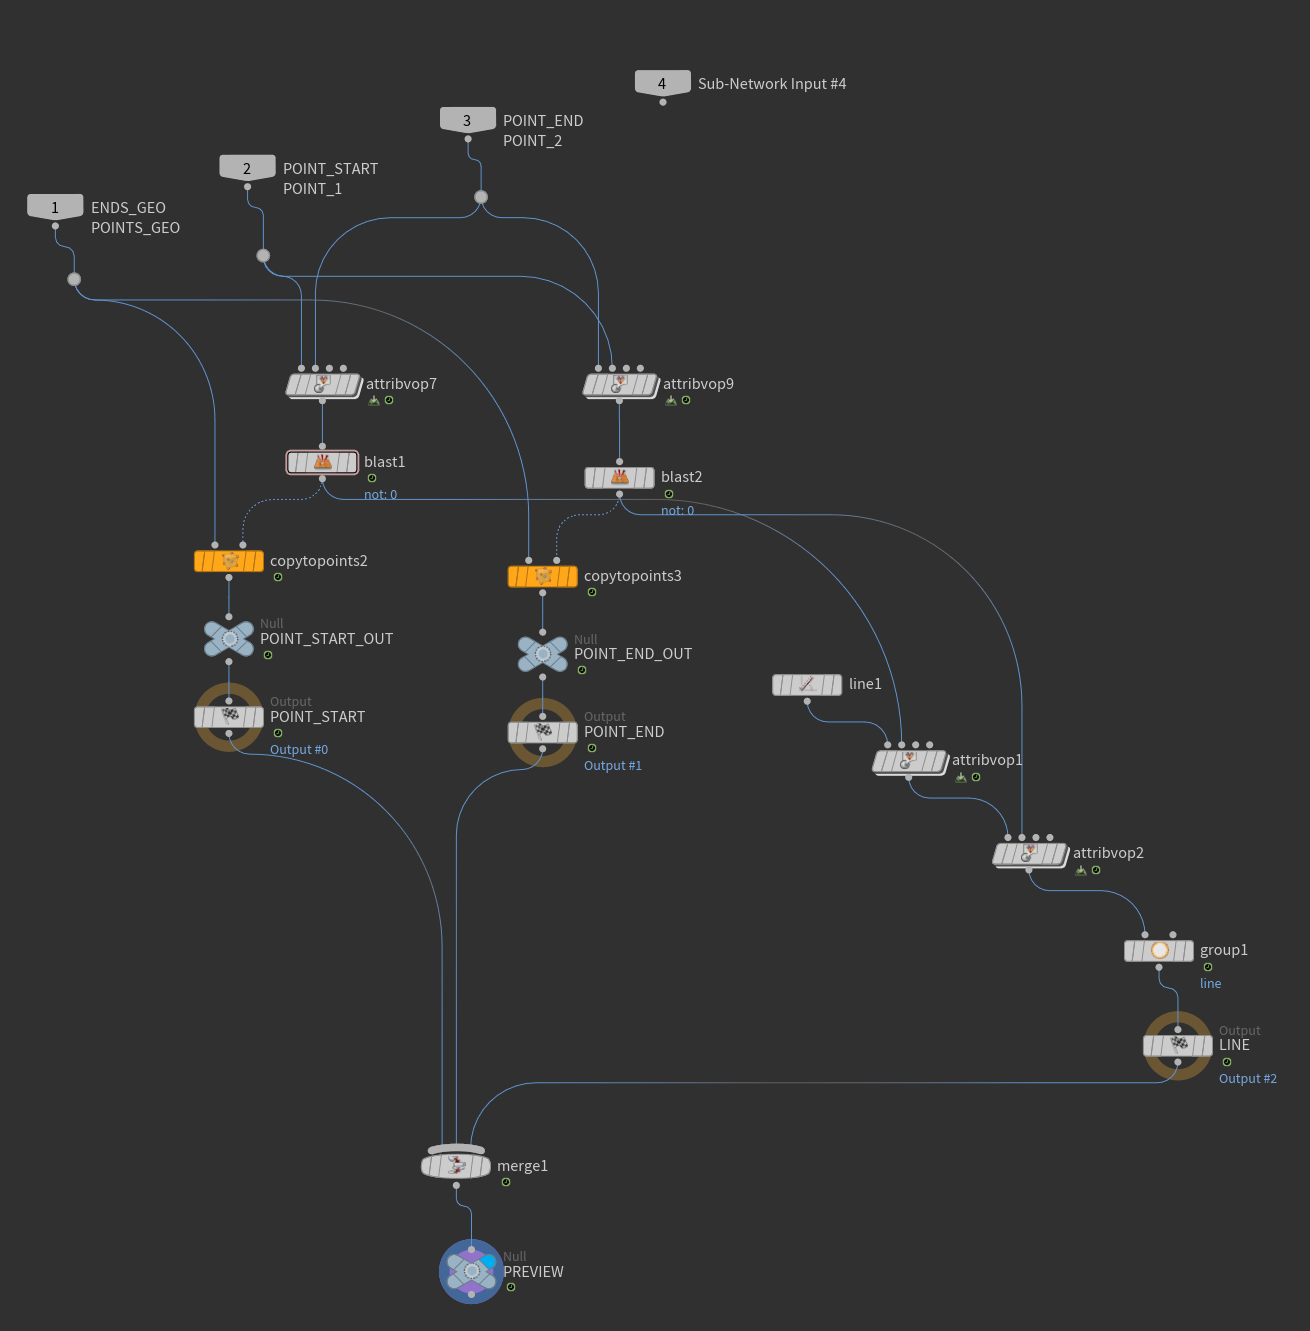
Subnet edited here to add a line with two points: Point 0 and Point 1.
Two attribute VOPs, one to control the position of each point.
Then grouped to place them in "line" points group.
Two attribute VOPs, one to control the position of each point.
Then grouped to place them in "line" points group.
Attribute VOP to configure position of points in two-point line.
Done separately via two separate VOPs here.
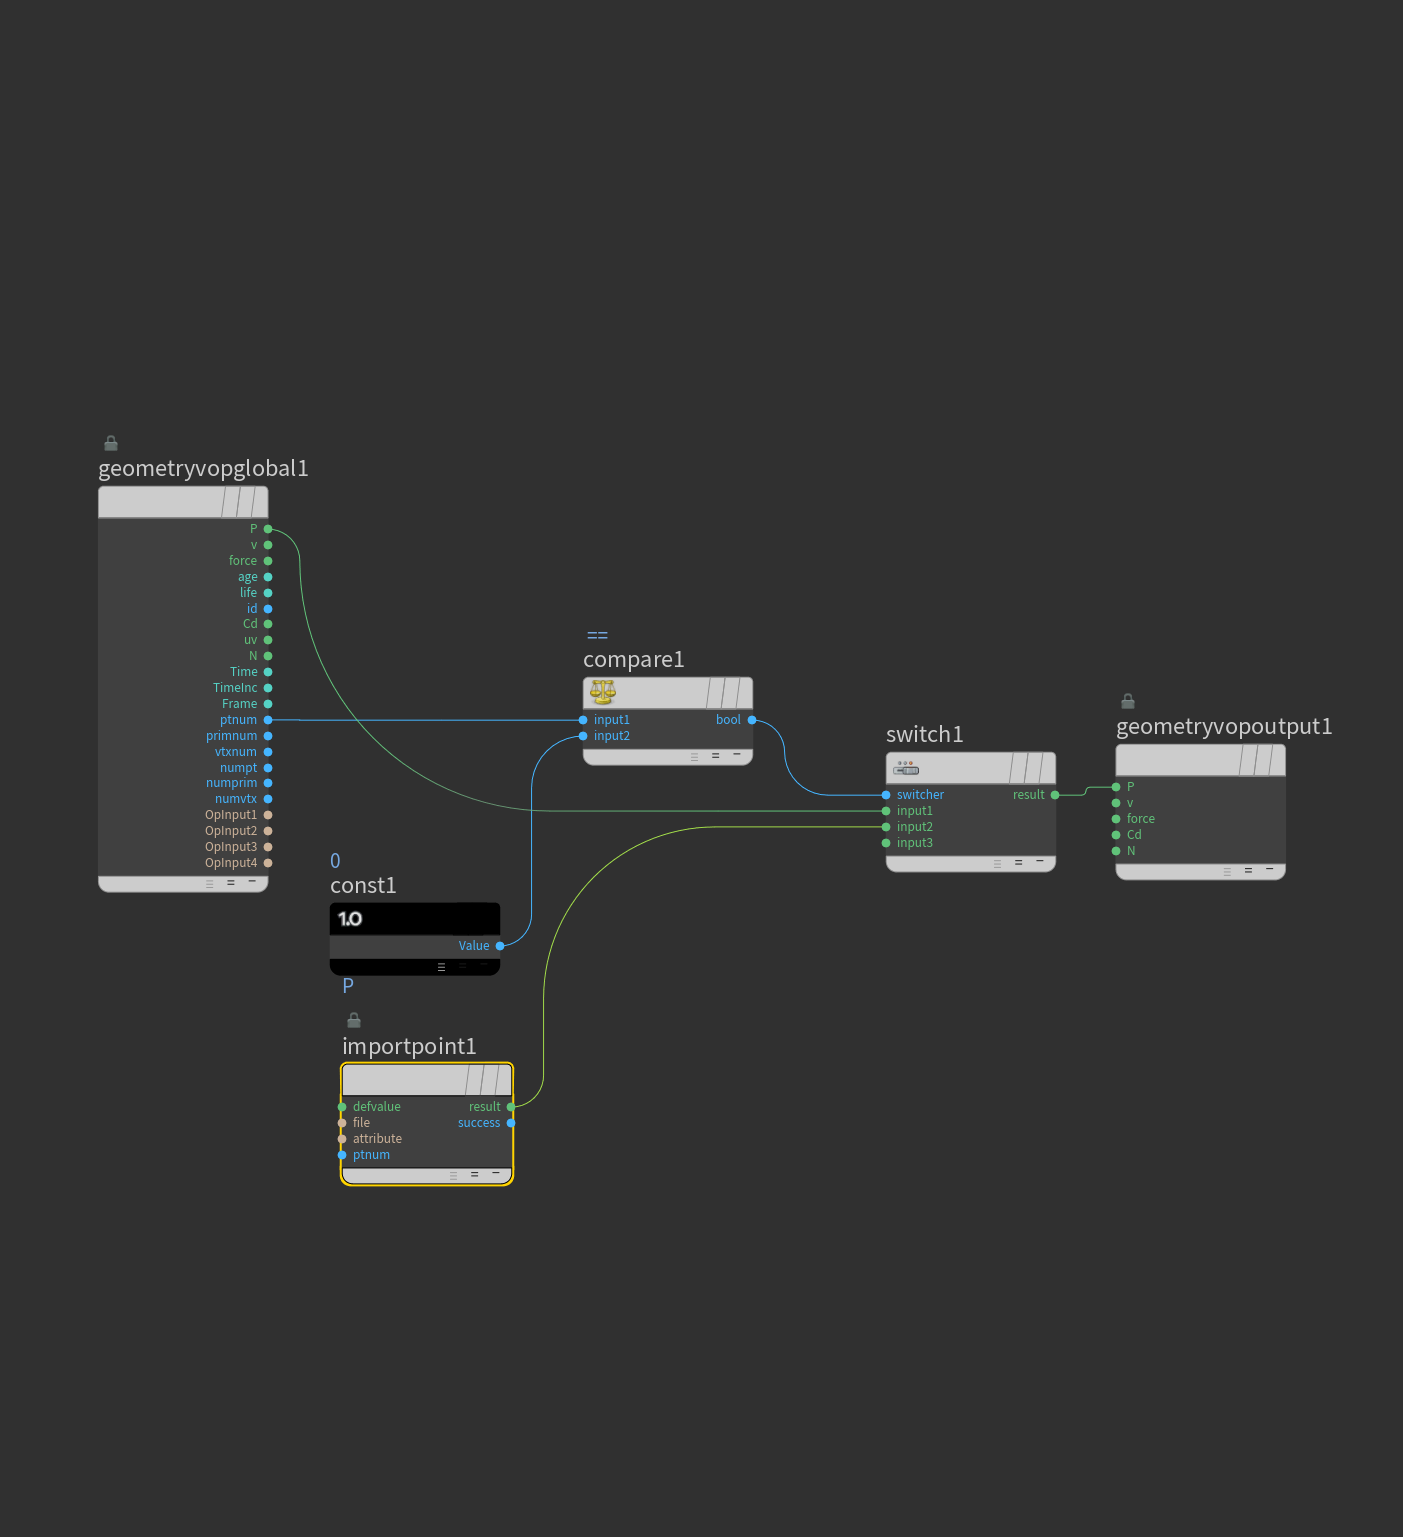
Compare and Switch nodes used. Switch inputs: take either existing position or position from second input to the VOP.
If point number = 0, then YES, then input 2. If no, take existing position.
Done separately via two separate VOPs here.
Compare and Switch nodes used. Switch inputs: take either existing position or position from second input to the VOP.
If point number = 0, then YES, then input 2. If no, take existing position.
GLTF Variation Preview
This is a preview of a variation version of the Look At workflow. Interact with the model to explore the alternative setup.
Additional point and fused lines are visible in this variation.
Additional point and fused lines are visible in this variation.