Pyrosolver Example Setup
Basic workflow for setting up Pyrosolver in Houdini
Overview
This workflow shows a typical setup for Houdini's Pyrosolver. Pyrosolver is used for simulating fire, smoke, and other gaseous effects.
Node Network Example
Preview of a Pyro solver simulation in action
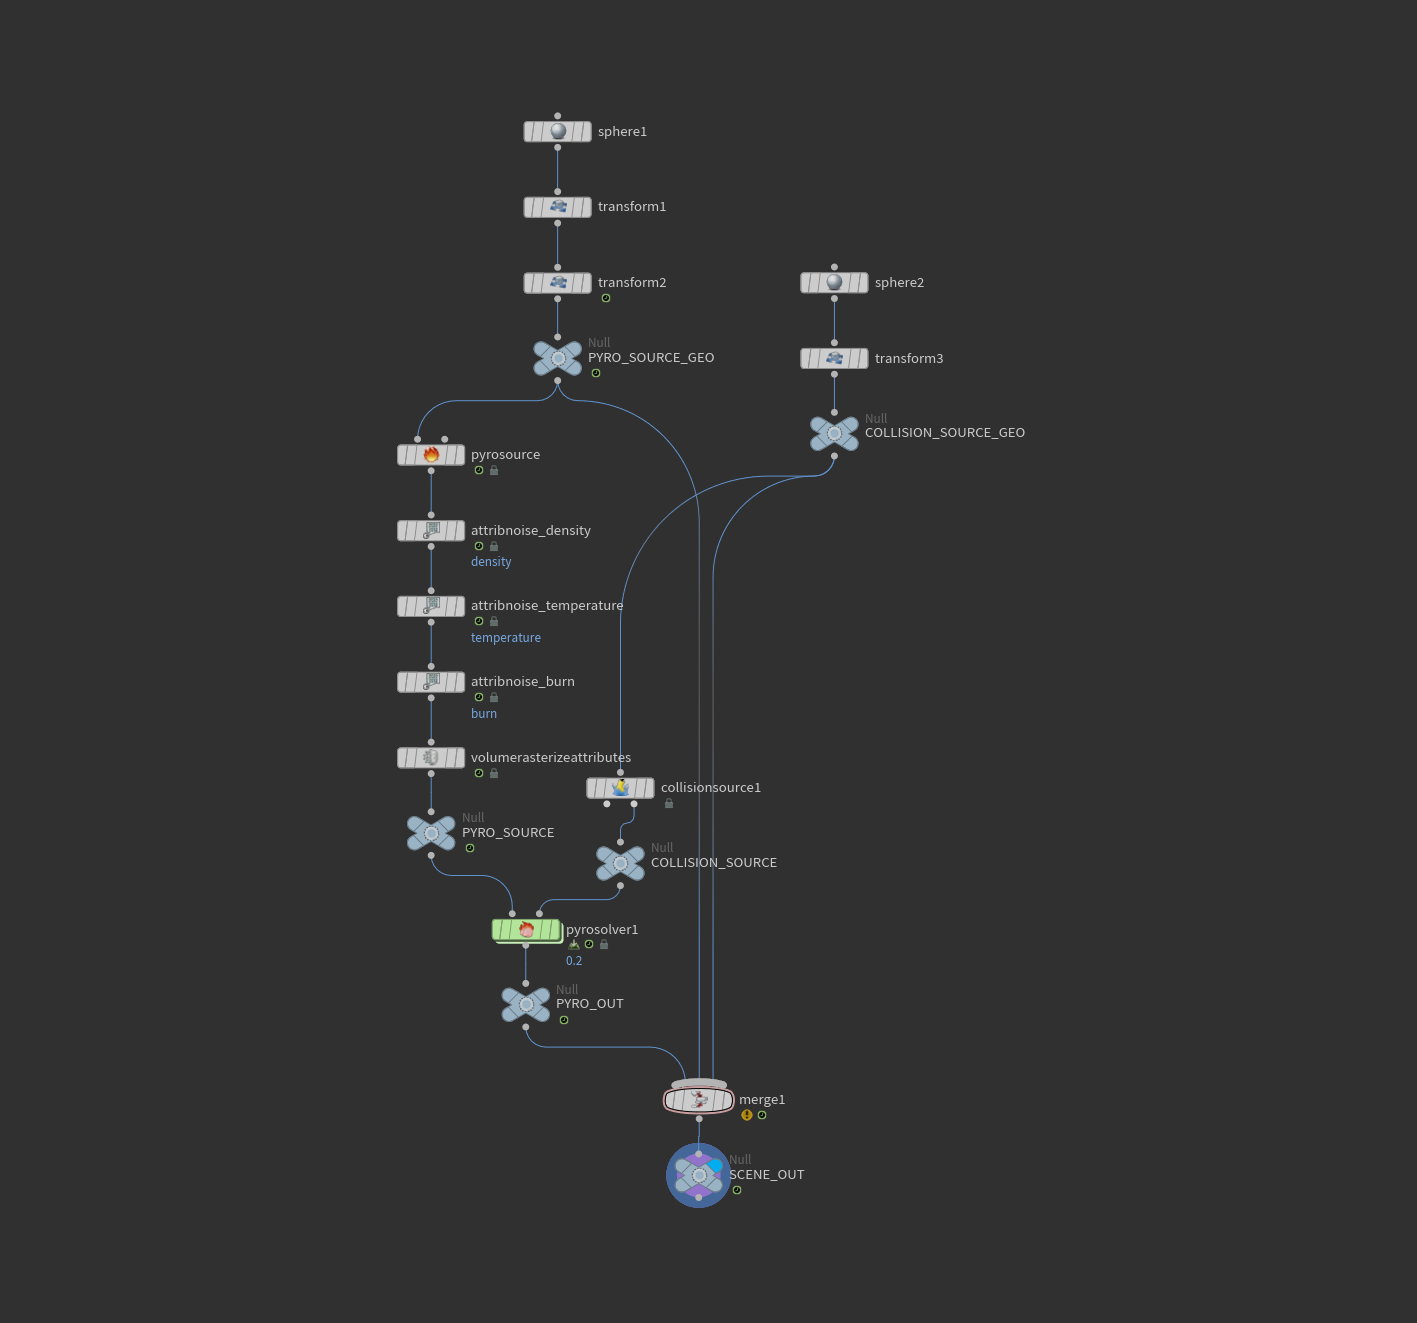
Basic Pyrosolver setup for gaseous effects
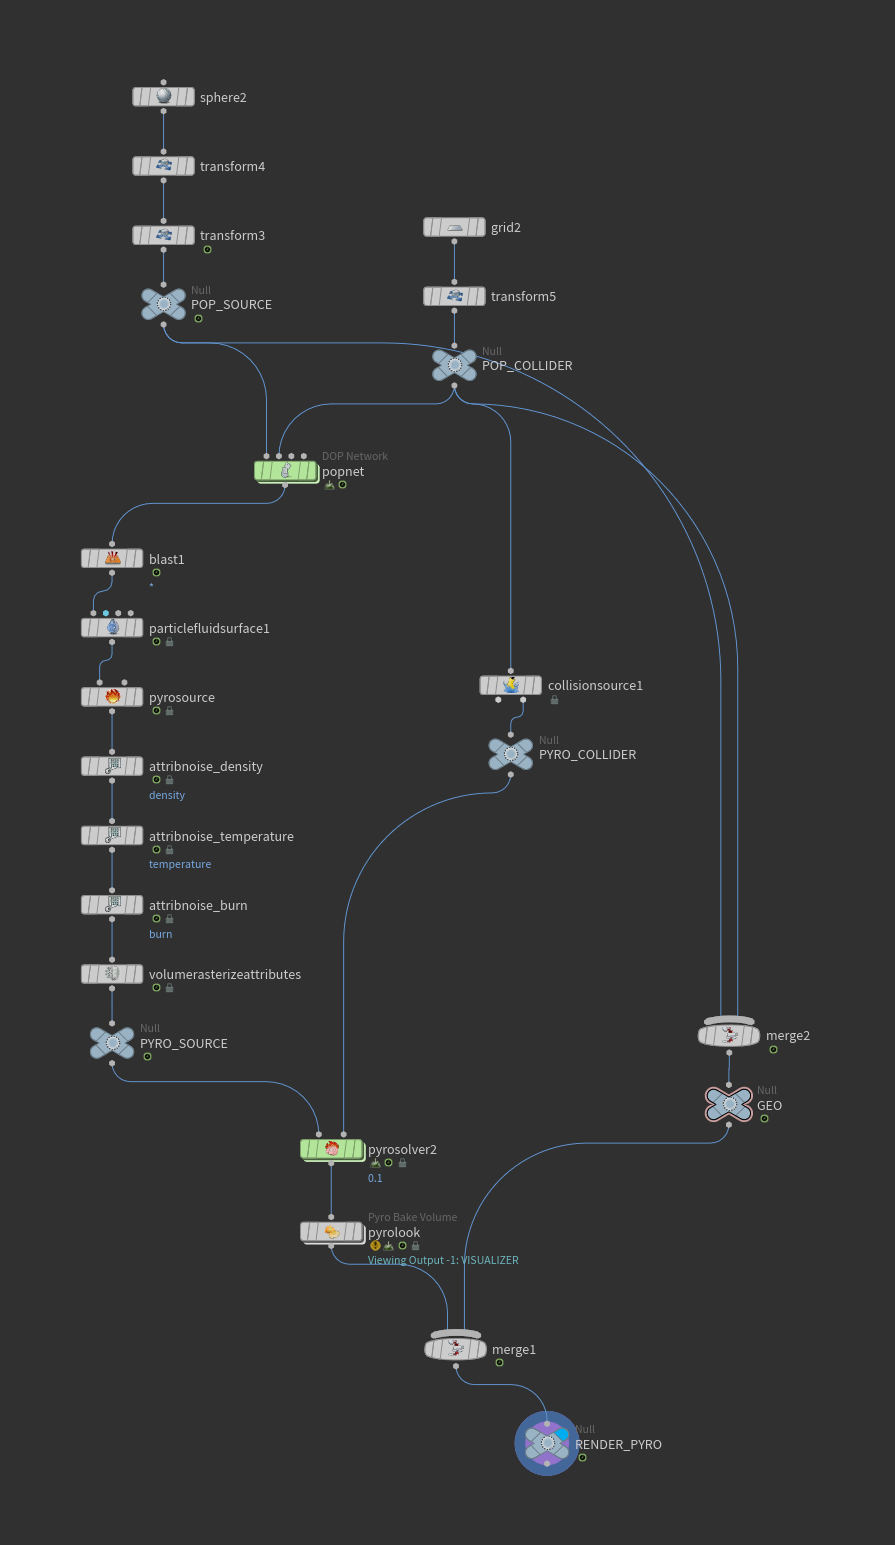
Detailed view of the POP to Pyro solver setup
Typical Steps:
Pyrosolver provides advanced controls for smoke, fire, temperature, and turbulence.
- Create source geometry for emission.
- Use a Volume Rasterize node to convert geometry to fields.
- Connect to Pyrosolver for simulation.
- Adjust Pyrosolver parameters for desired look.
- Visualize and export the result.
Pyrosolver provides advanced controls for smoke, fire, temperature, and turbulence.
Additional Resources
For more detailed information, check the official Houdini documentation on Pyrosolver and volumetric simulations.