RBD Example Setup
Basic rigid body dynamics setup in Houdini for destruction simulations
Overview
Rigid Body Dynamics (RBD) in Houdini provides a powerful system for creating realistic destruction and collision simulations. This example demonstrates a basic setup for fracturing objects and simulating their physical interactions.
Preview
Full resolution preview of the RBD simulation
Node Network Structure
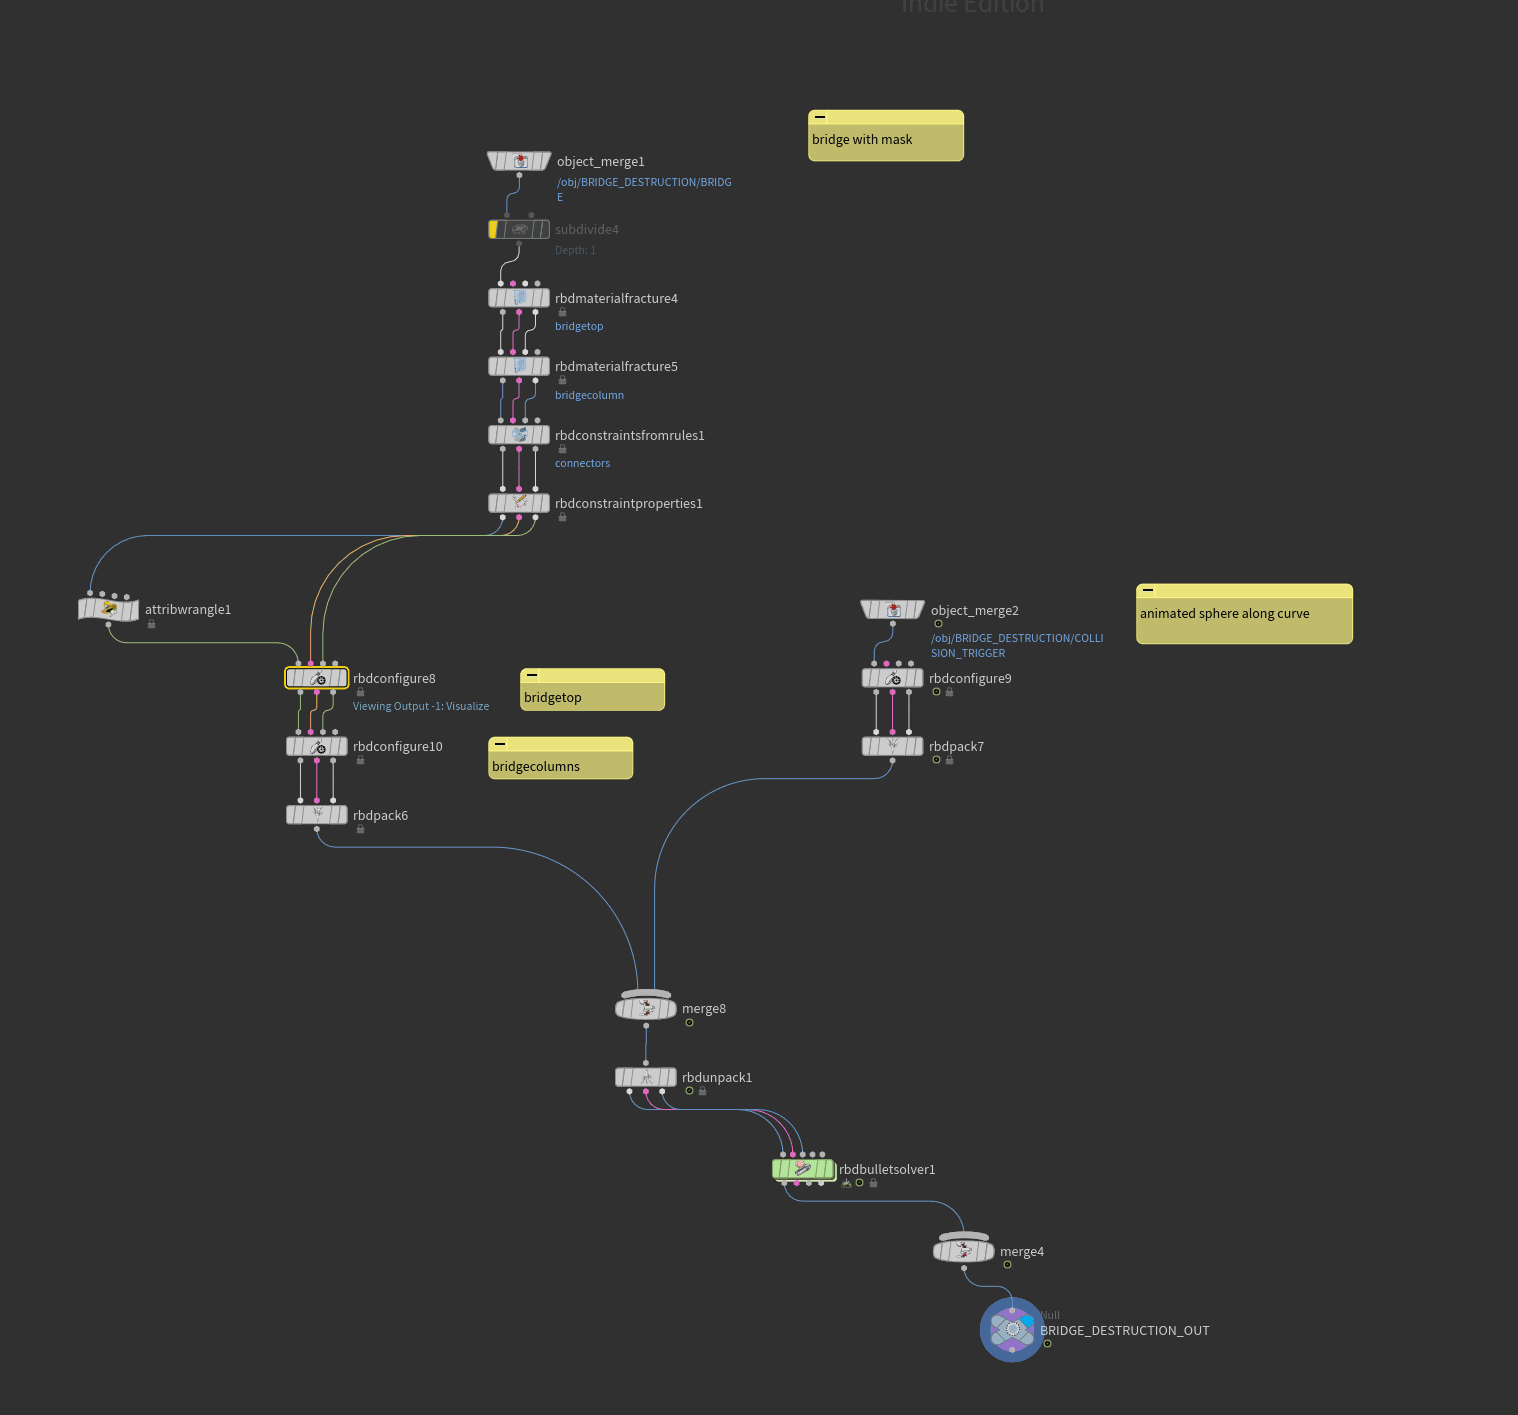
Overview of the RBD network structure

Initial geometry setup and fracturing
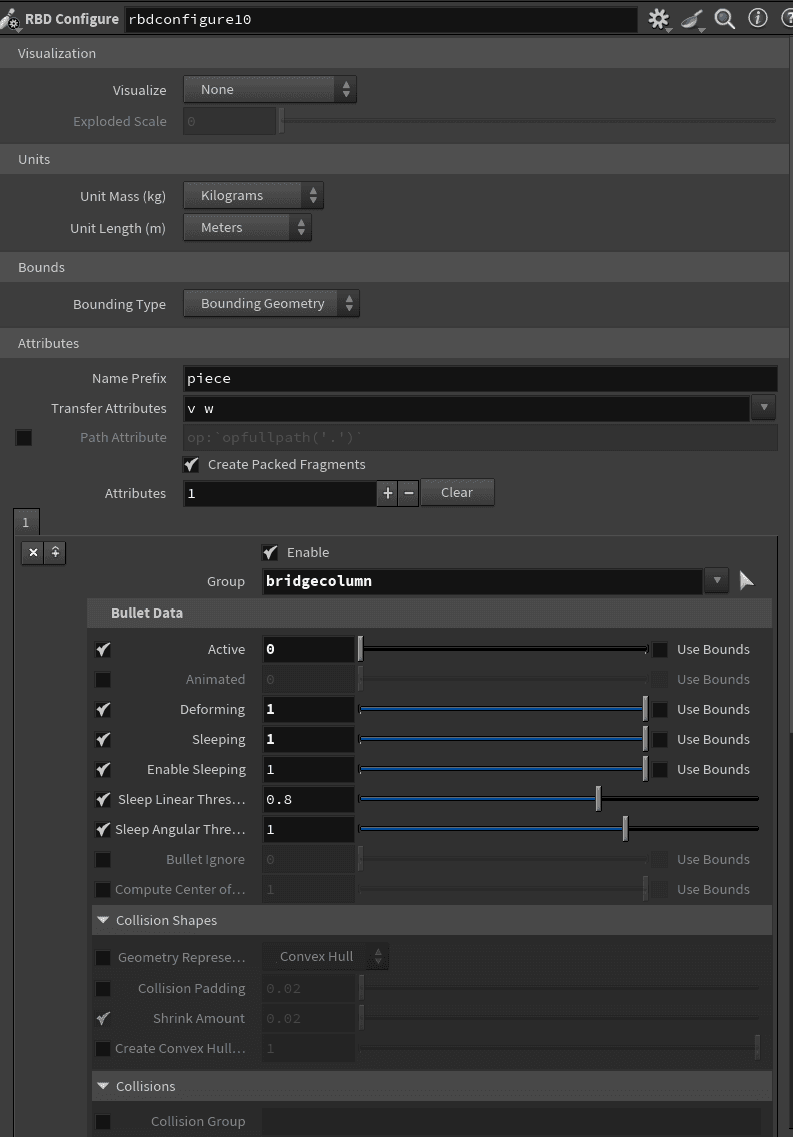
RBD Solver configuration
Collision and dynamics settings
Post-processing and output setup
Key Components:
- Input Geometry: The object(s) to be fractured and simulated
- RBD Material Fracture: Creates the broken pieces with interior detail
- RBD Solver: Handles the physics simulation and collision detection
- Ground Plane: Collision surface for the simulation
- Output Processing: Post-simulation cleanup and attribute management
Common Parameters
Essential Settings:
# RBD Material Fracture
interior_detail = 1
fracture_pattern = voronoi
piece_count = 20
# RBD Solver Parameters
substeps = 2
collision_margin = 0.01
gravity = {0, -9.81, 0}
friction = 0.3
bounce = 0.3
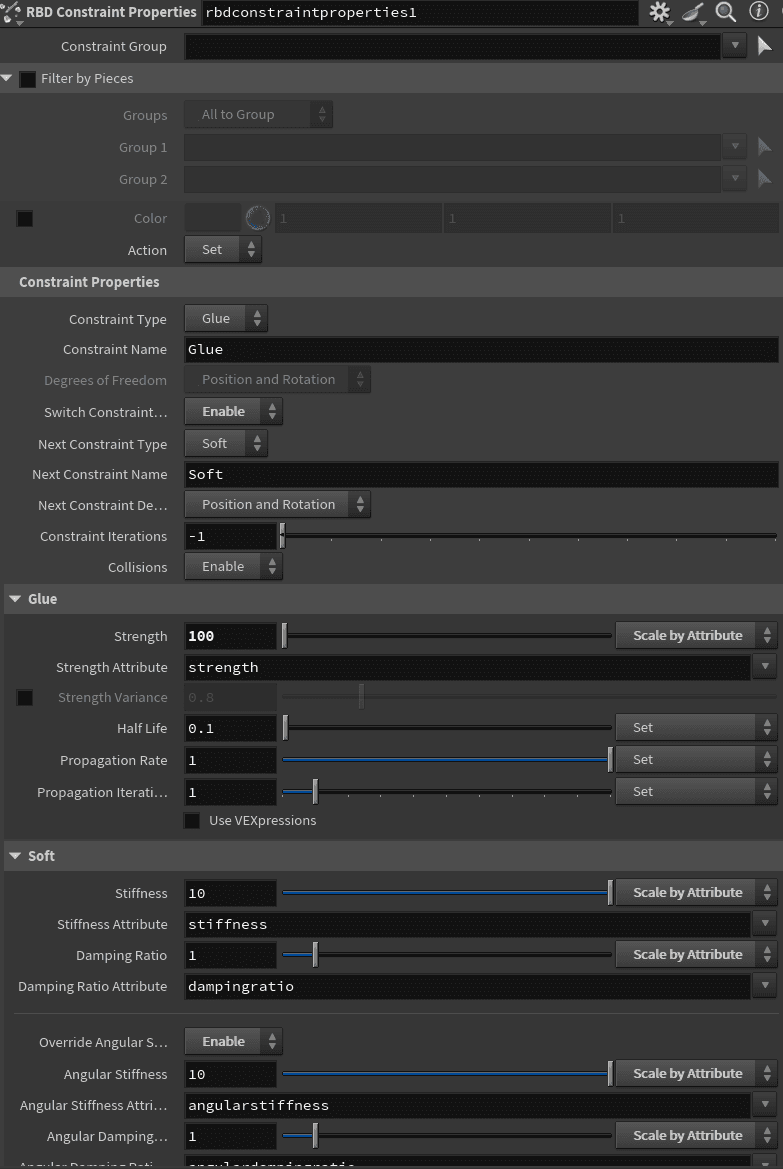
# Attribute Wrangle for Glue Parameters
@strength = @maskglue*10;
@stiffness = @maskglue +.1;
@angularstiffness = @maskglue +.1;
@dampingratio = @maskglue *.1 +.1;
@angulardampingratio = @maskglue *.1 +.1;Tips for Parameter Adjustment:
- Increase
substepsfor more stable simulations - Adjust
collision_marginbased on object scale - Use
frictionandbounceto control object interaction - Modify
piece_countfor different fracture granularity
Best Practices
- Use a File Cache SOP to save simulation results
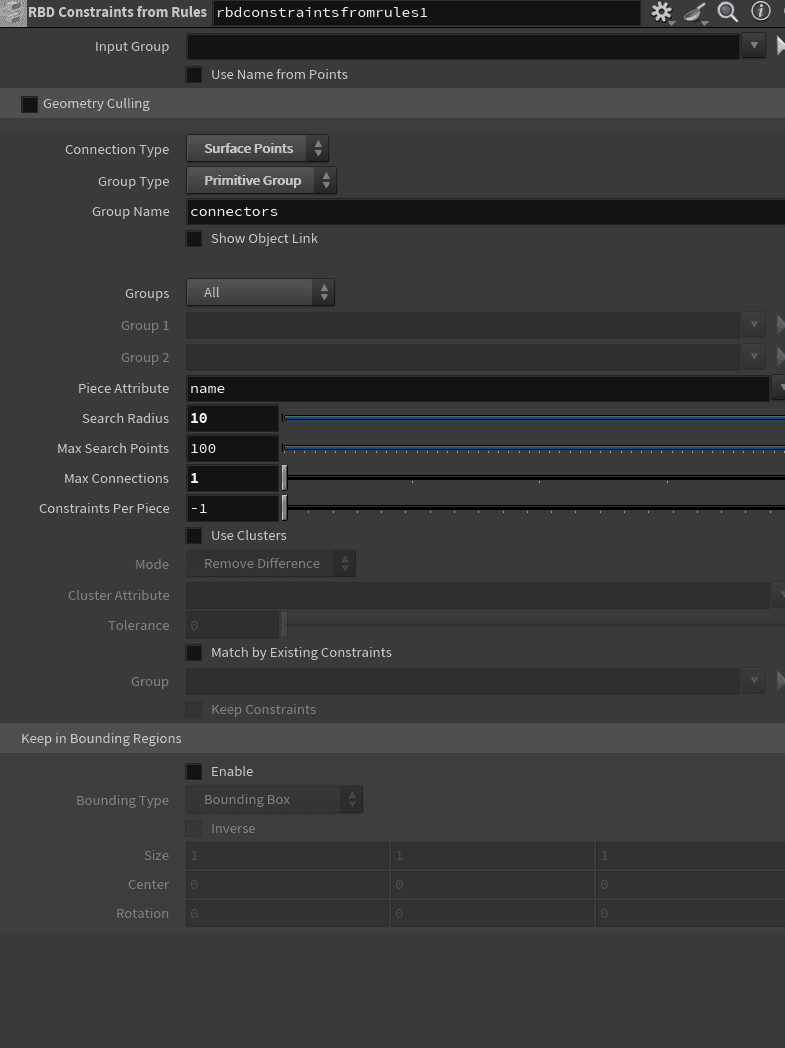
- Add constraints or glue to control fracture behavior
- Consider using clustering for more natural break patterns
- Add noise or custom patterns to fracture points
- Use proper collision geometry for accurate interactions