Motion Clips
Setting up character animation with motion clips and blending
Overview
This workflow demonstrates how to set up a character animation system using motion clips in Houdini, including T-pose setup, animation sequence configuration, and prop attachment. The setup allows for clean transitions between poses and provides a foundation for adding props, hair, and clothing.
Step-by-Step Process


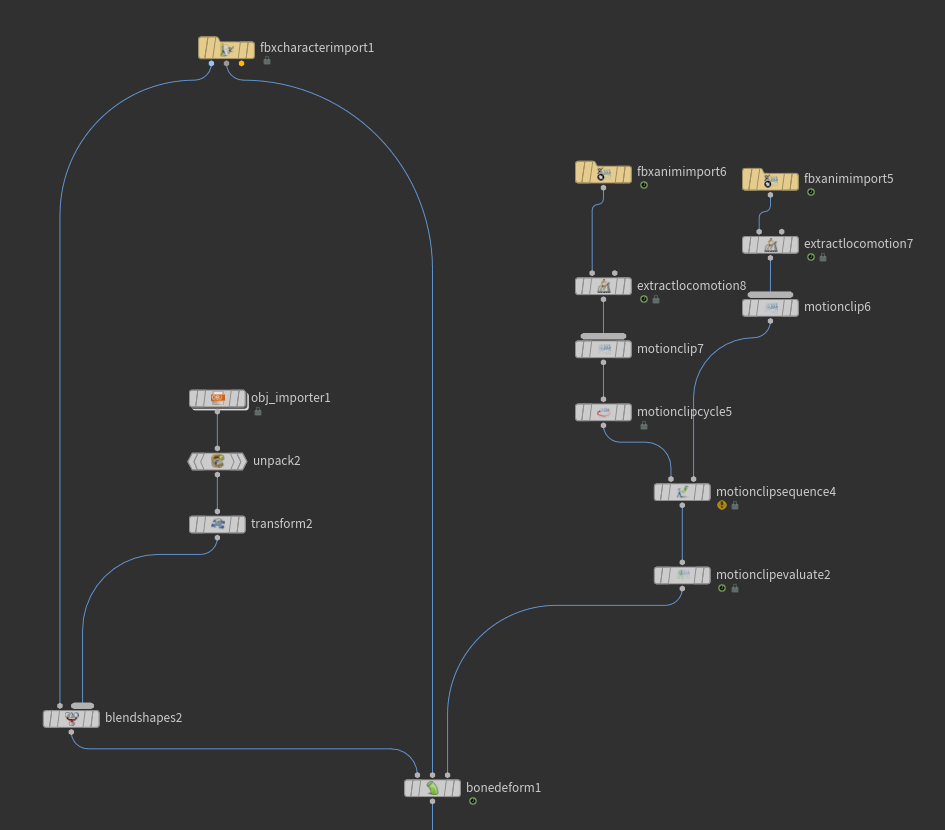
Motion Clip Sequence setup showing T-pose transition into animation
Initial Setup
1. Character Import and T-Pose
- Import your character model (FBX, Alembic, etc.)
- Create a Motion Clip node for the T-pose
- Set this as your rest pose for the initial frame
- This T-pose will serve as the foundation for attaching props and accessories
Motion Clip Configuration
2. Setting Up Motion Clips
- First motion clip: T-pose (rest pose)
- Second motion clip: Your character animation
- Set motion clip cycle frame range to 0-20 (or your desired range)
- In Motion Clip Sequence node, set Blend Frames to 20 for smooth transition
This setup ensures your character starts in T-pose and smoothly transitions into the animation. The blend frames parameter (set to 20) creates a gradual transition between the T-pose and the start of your animation sequence.
Animation Processing
3. Motion Extraction and Evaluation
- Use Extract Location node to separate positional data
- Motion Clip Evaluate node processes the animation sequence
- Configure time offset and blending parameters as needed
- Use these nodes to control and modify the character's motion
Tips and Best Practices
- Always start with a clean T-pose for consistent setup
- Use sufficient blend frames for smooth transitions
- Create clear naming conventions for motion clips
- Test prop attachments through full animation range
- Consider using null objects as attachment points for complex props
Related Pages
See also: Vellum Cloth Constraint Point Deform - Learn how to add cloth simulation to your character setup using point deform constraints.